Testing Painting Techniques - Slapchop

Slapchop
An alternative title for this might be “Zombicide Invader - Civilian Extras Part I”. As with all CMON Kickstarters you get a truckload of extra models. So I needed a way to get them quickly and effectively painted if I had any hope of getting them done in a sensible timeframe. And when slapchop became an internet buzzword it seemed an ideal solution. In fact, I had toyed with the concept a couple of years ago by copying a Marco Frisoni video. I quite liked the results so I was intrigued to give it another go. With some differences to speed up the process.
Now, slapchop or grisaille underpainting does have some limitations. As the shadows tend to be very dark, if not pure black, so it can struggle with lighter colours and white is a forlorn dream. Additionally, I don’t have a huge range of suitable paints; I have 15 Citadel Contrast paints and a couple of the Scale75 Instant Colours.
With that in mind, I picked out six miniatures that I felt would be suitable for my test. I stuck a bit of slate to their bases with super glue and primed them black. Once the primer had cured I gave them a heavy zenithal with Vallejo Cold Grey. I felt this would be quicker and easier than going a heavy drybrush with a dark grey then a lighter drybrush with a lighter grey. Get it all done in one coat. Finally, I gave each of them a drybrush with Ceramite White, paying particular attention to the faces. With all that done, I could then start slapping on Contrast paints.
Butcher Carl
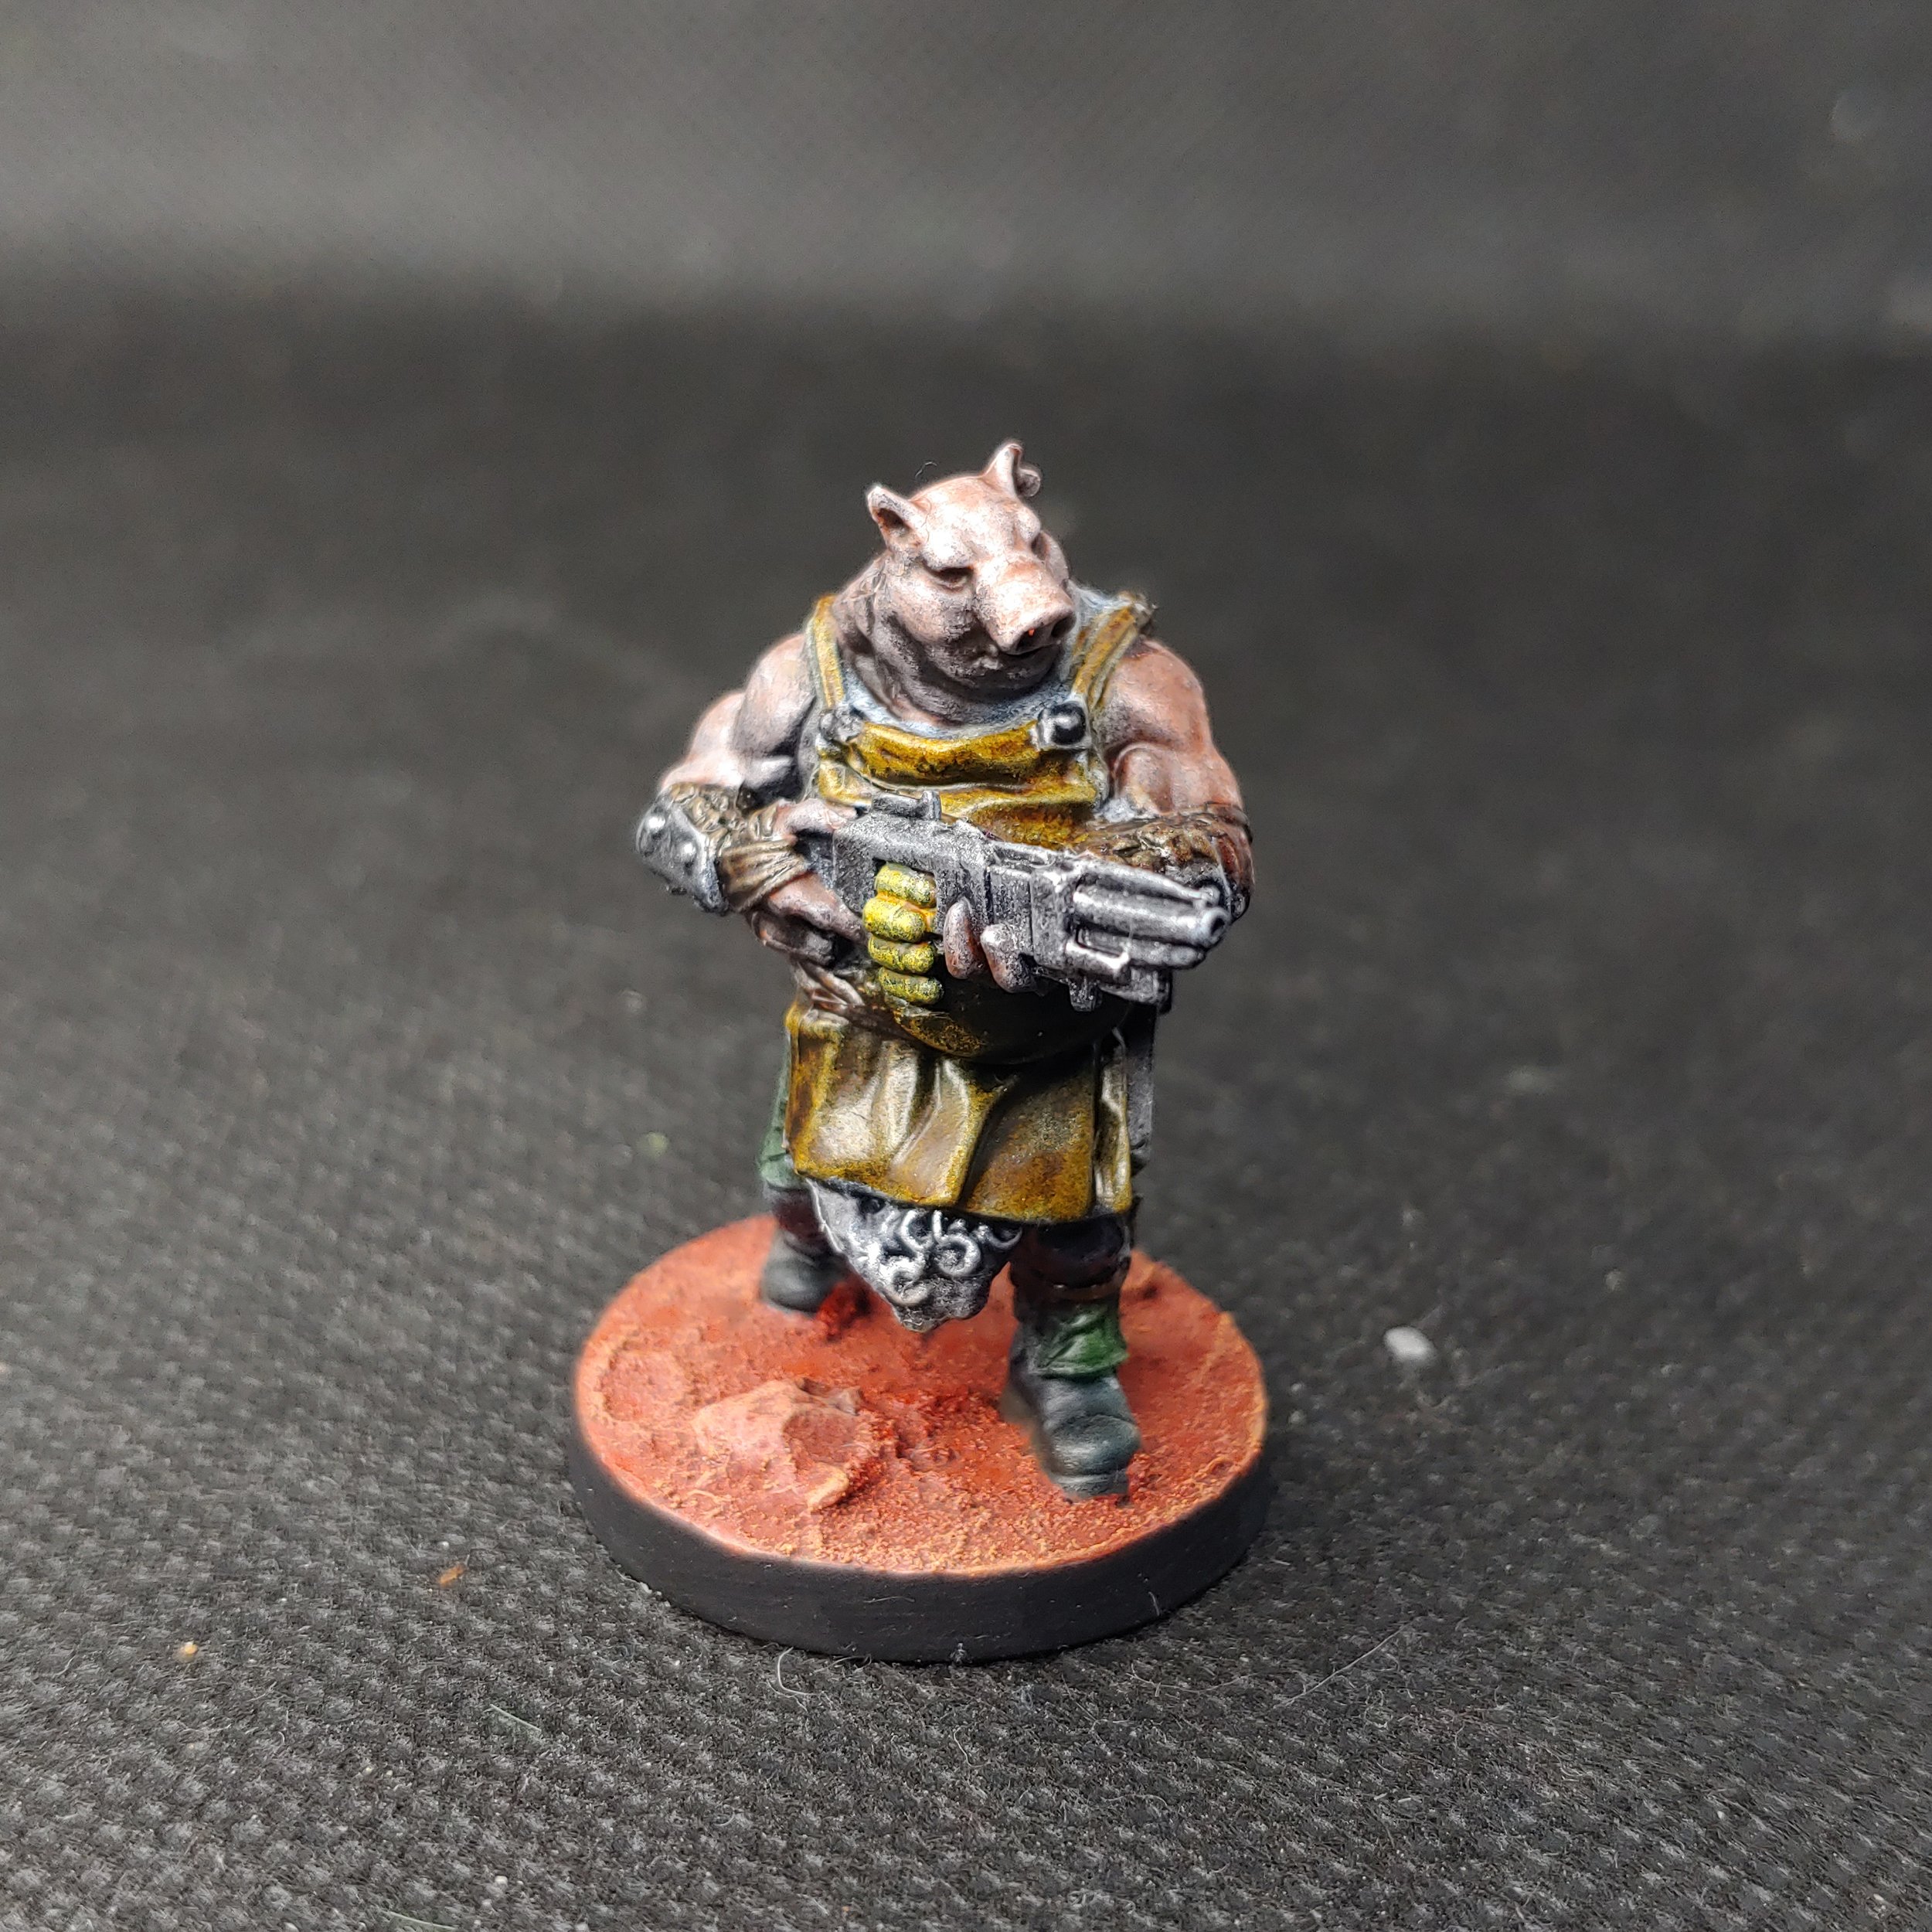
I believe that Butcher Carl may be a reference to Bebop, one half of the Bebop and Rocksteady duo from the Teenage Mutant Ninja Turtles. Either way, the pigman was first on my list.
I started by giving the exposed flesh a coat of Guilliman Flesh. His vest I painted with Skeleton Horde, a bit of a gamble painting such a light colour but it didn’t turn out too badly. His leather apron I painted with Snakebite Leather, whilst the wraps on his hands I painted with Cygor Brown and the pouches with Gore-grunta Fur. His trousers I painted with Creed Camo and his boots with Black Templar. His gun I painted with Basilicanum Grey followed by a drybrush of Necron Compound. The belt of bullets I painted with Iyanden Yellow, probably not the best choice for brass but you work with what you have.
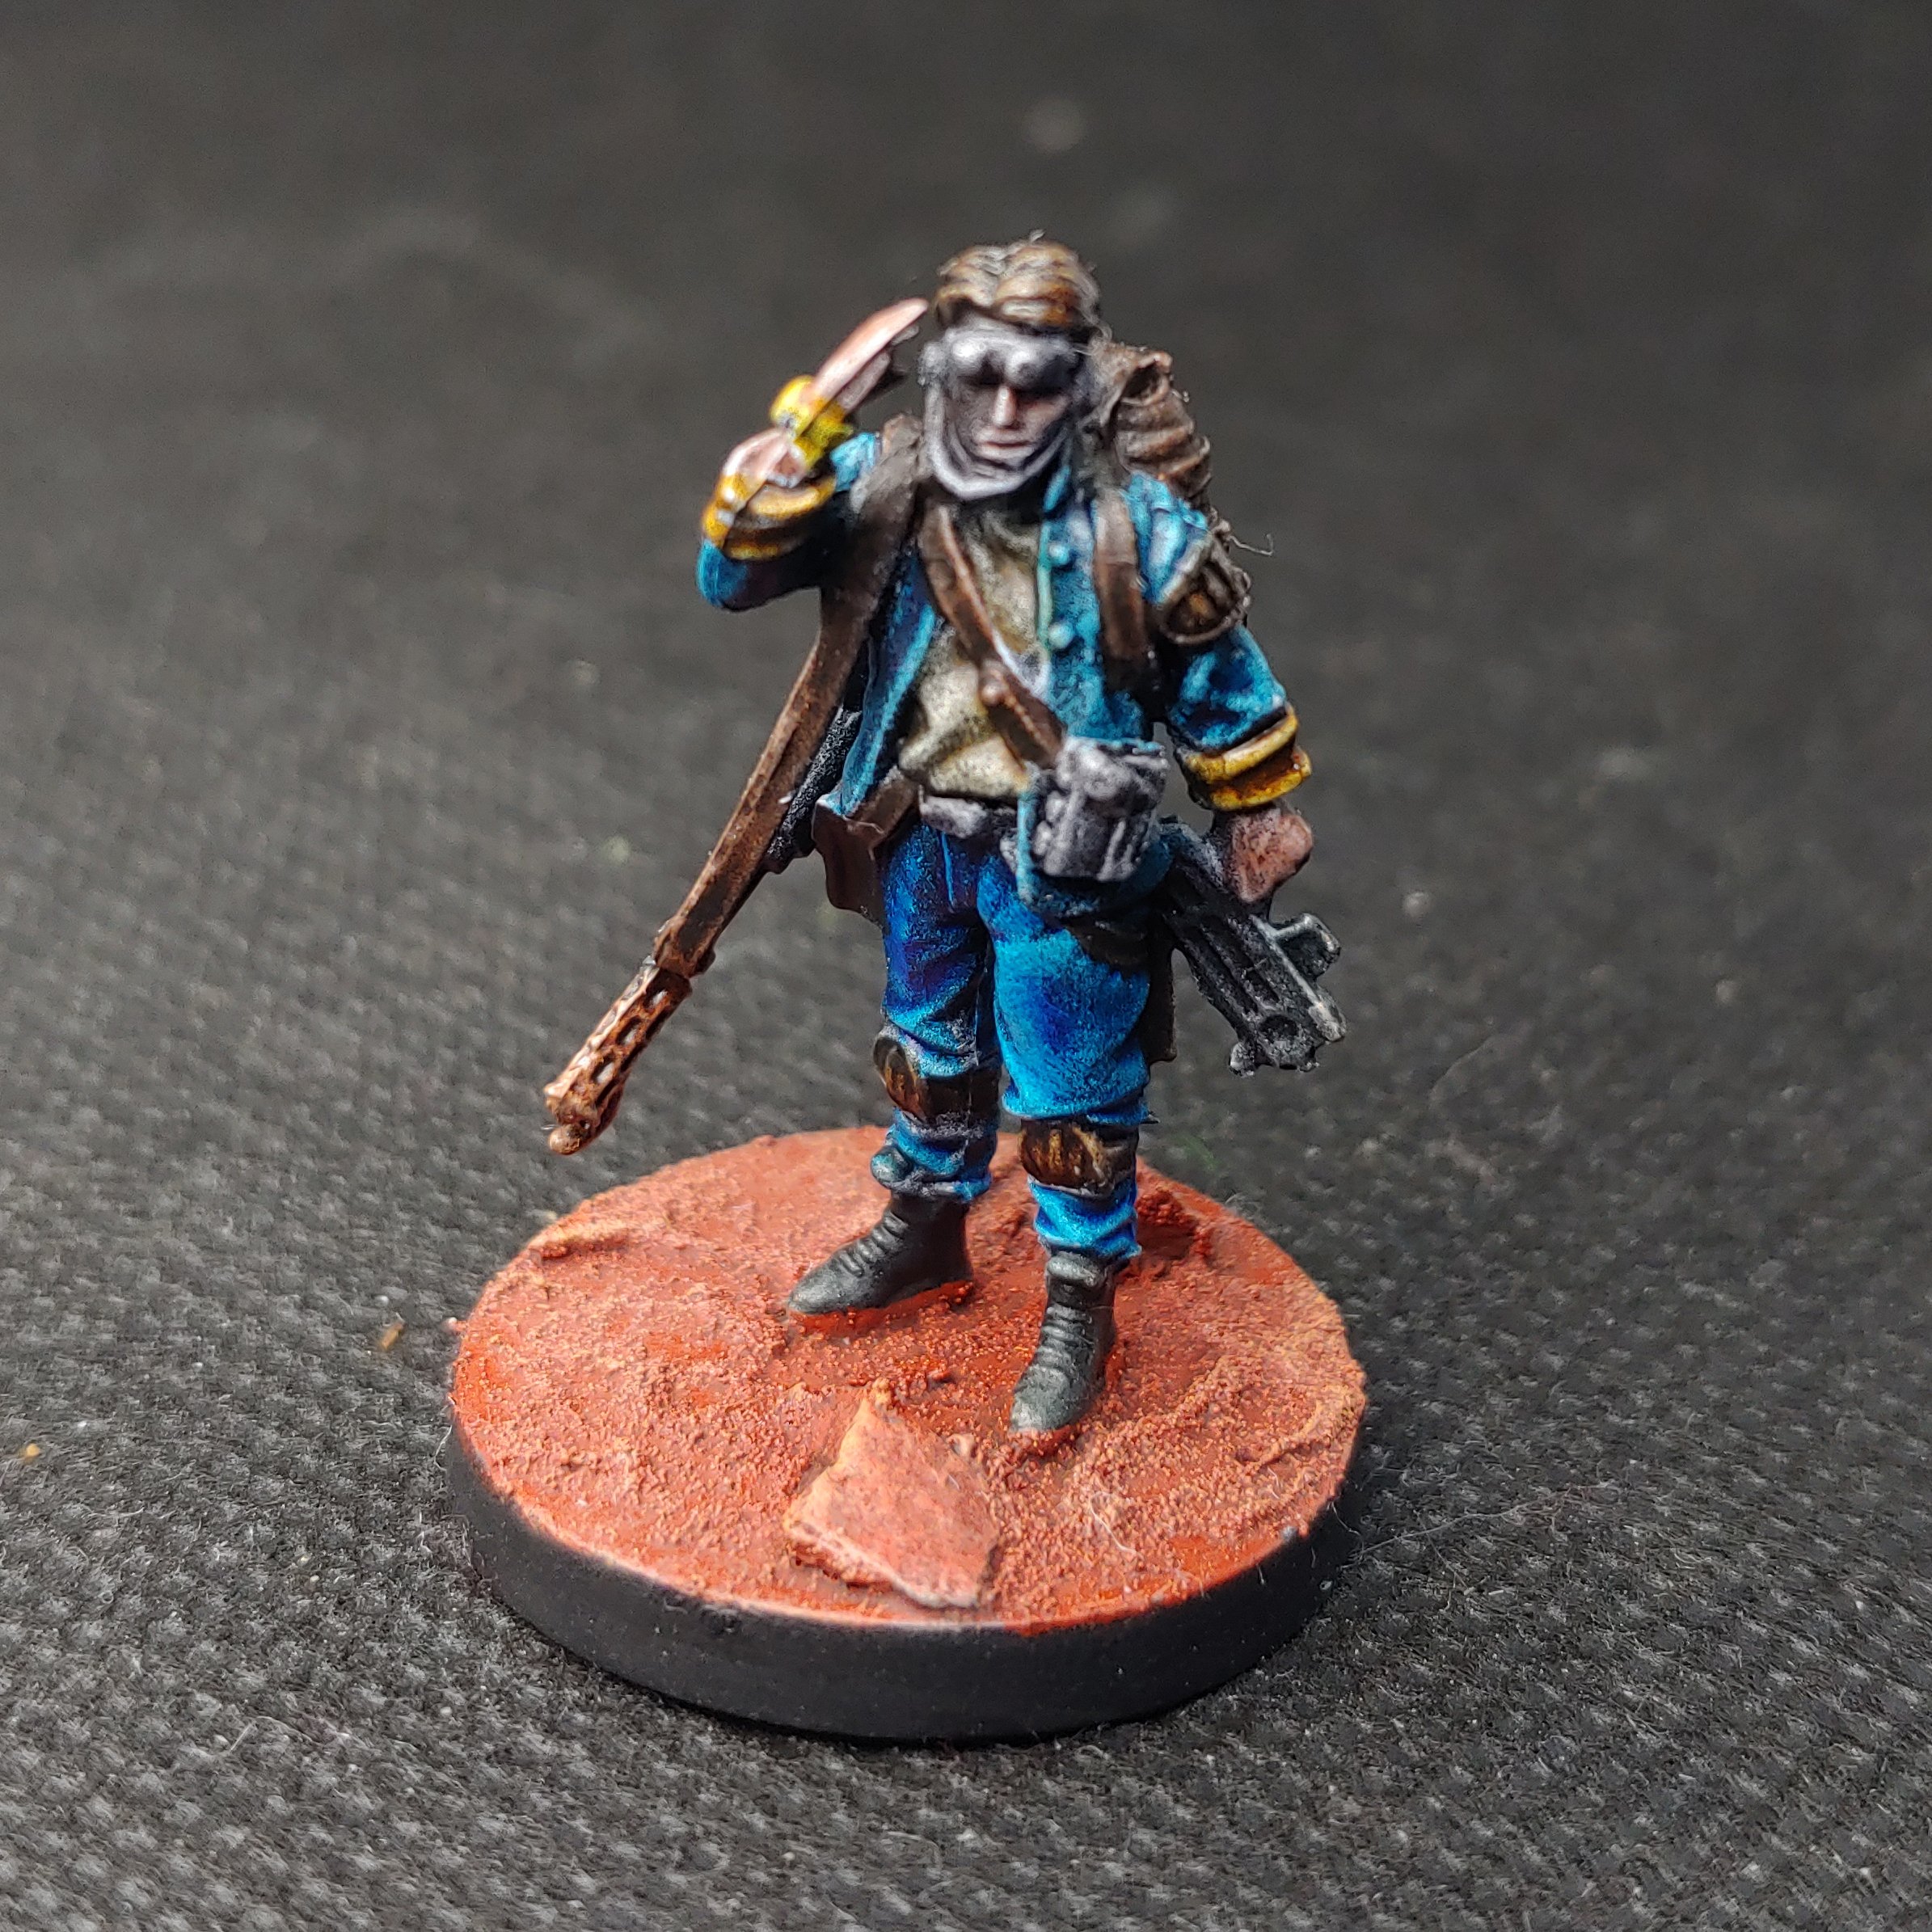
Captain Warlock

With his eye patch and billowing coat I’m fairly sure that Captain Warlock is in fact a reference to the anime character Captain Harlock. Maybe with a bit of Captain Hook mixed in?
His skin I painted with Guilliman Flesh and his hair with Cygor Brown. I additionally painted his leather boots and belt with Cygor Brown. His trousers I painted with Black Templar and his shirt with Talassar Blue. The majority of his coat I painted with Blood Angels Red, the lapels and cuffs I painted with Snakebite Leather. The inside of the coat I left in its mostly black state. The remaining details, the gun, sword, bionic arm and creature on his shoulder, I painted with Basilicanum Grey. The metal details were then drybrushed with Necron Compound.
Commander Morton

So evil his head isn’t in focus
Obviously a reference to Evil Morty from Rick & Morty but also I think a reference to Commander Keen. Both are kids that go on space adventures after all.
As always I started by giving the skin a coat of Guilliman Flesh, his hair I painted with Cygor Brown. His t-shirt I painted with Iyanden Yellow and his jeans with Talassar Blue. This pouches and the pads on his shoulders and knees I painted with Snakebite Leather. His shoes and eye patch I painted with Black Templar. I painted his gun and the wraps on his wrist with Basilicanum Grey. I finished by drybrushing his gun with Necron Compound.
Gavin “Greaser” Morley

I’m fairly sure that Gavin is a reference to Danny Zuko from Grease, judging by the leather jacket and pompadour hair. Although the artwork has him with white hair, which I won’t be painting because slapchop.
As with everyone else I painted his skin with Guilliman Flesh. His shirt and socks I painted with Skeleton Horde. His jacket and shoes I painted with Black Templar, whilst his trousers I painted with a coat of Talassar Blue. His hair and weapons I painted with Basilicanum Grey, the cylinder of the revolver I painted with Iyanden Yellow. The weapons I then drybrushed with Necron Compound.
Lara

I’m not sure who Lara is a reference to, it doesn’t seem to be Ms. Croft at any rate. Perhaps she is a reference to a replicant from Blade Runner? Although the strappy clothes and stance is very reminiscent of Leeloo from The Fifth Element.
As is tradition by this point I started by painting her skin with Guilliman Flesh. Her tank top and trousers I painted with Creed Camo. The various straps and pouches about her person I painted with Snakebite Leather. Her boots, the gun and the badge she is holding I then painted with Black Templar, the star in the centre of the badge I then picked out with Iyanden Yellow. As with the others, the gun was then drybrushed with Necron Compound. I finished things off by painting her hair with Talassar Blue.
Morty McCallister
No doubt about it, Morty is absolutely a reference to Marty McFly from the Back To The Future series of films.
And so for the last time in this article, I painted his skin with Guilliman Flesh. His hair and knee pads I painted with Cygor Brown. I picked out his shirt with Skeleton Horde. The backpack and any leather straps I painted with Wyldwood. For the jacket, I mixed Talassar Blue with some Basilicanum Grey to desaturate it and painted it on in an even coat. The trousers I painted with pure Talassar Blue. The goggles and the walkman I painted with Basilicanum Grey. The weapons and his shoes I painted with Black Templar. The muzzle of the flamer I painted with Gore-grunta Fur. Lastly, I drybrushed the weapons and the walkman with Necron Compound.
Bases
With the miniatures complete I could move onto the bases. I started by giving the rocks a coat of Vallejo Fire Red. After which I filled out the rest of the base with Vallejo Red Oxide texture paste. Once that had fully dried I washed the whole base with Reikland Fleshshade. And once that was dry, I then drybrushed the base with Kindleflame. Last but not least, I painted the rims of the bases with a matte black.
Final Thoughts
I am really pleased with how these came together, more so with how quickly I was able to get these done. These took me a couple of days painting on and off to get the six of them finished. Had I painted them in the usual way with basecoats, washes, layers and highlights they would have taken me a week or more. Such speed comes at a price though, despite using bright and bold Contrast paints they have ended up quite dark due to them being painted over that dark primer. Additionally, the models aren’t quite as crisp as those painted in the traditional method. But that’s fine by me, these models are destined for the tabletop rather than the display cabinet.
For my next batch I definitely need to grab a few more Contrast paints. I’ll have to take a look through the Army Painter Speed Paint range and see if anything takes my fancy. I’m certainly tempted to pick up one of their metallic Speed Paints, as Iyanden Yellow does not make for a good gold or brass substitute.